Surface cleaning is the backbone of every successful polyurea coating application. Without proper preparation, coatings can peel, bubble, or fail entirely, often leading to costly repairs. Here’s what you need to know:
- Adhesion is Key: Dust, oil, and moisture weaken the bond between the coating and surface, leading to early failures.
- Moisture and pH Checks: Concrete surfaces should have less than 8% moisture and a pH between 9–12 to ensure proper bonding.
- Surface Texture Matters: Grinding or sandblasting creates the rough texture needed for polyurea to grip effectively.
- Fast Curing Leaves No Room for Error: Polyurea cures in 10–20 seconds, so thorough cleaning is critical to avoid trapped gases or imperfections.
- Long-Term Savings: Proper cleaning upfront prevents premature failures, saving 2–3x the cost of repairs or reapplications.
Skipping these steps risks durability, appearance, and cost-efficiency. Companies like Atlas Concrete Coatings follow strict preparation protocols to ensure polyurea coatings last 10–20 years, even under heavy use. Always prioritize surface cleaning for lasting results.
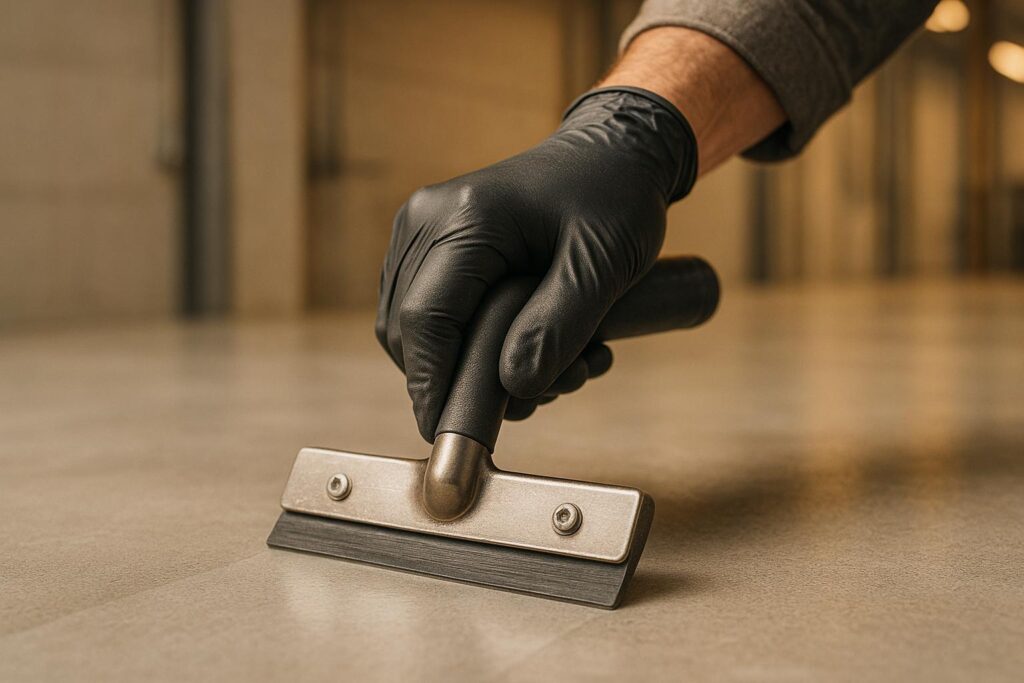
How Critical Is Concrete Surface Preparation For Thin-Mil Coatings? w/Josh Jones
Why Surface Cleaning Matters for Polyurea Coatings
Getting the surface preparation right is absolutely critical for applying polyurea coatings. Whether a coating lasts for years or starts peeling in no time often depends on how well the surface was cleaned beforehand. Let’s break down why proper cleaning plays such a big role in adhesion and preventing coating failures.
Creating Strong Adhesion
Polyurea coatings are known for their durability, but that strength depends entirely on their ability to bond to the surface. Dust, oil, grease, salts, rust, and leftover coatings can interfere with this bond, acting like a shield between the polyurea and the substrate. Even the tiniest particles can cause problems, which is why tests like water drop checks, moisture measurements, and pH testing are so important.
For steel surfaces, preparation often involves grinding or sandblasting to achieve an Sa 2.5 profile, which removes rust, salts, and other contaminants. Additionally, creating the right surface texture is key – smooth surfaces just don’t provide the grip needed for a strong mechanical bond.
Preventing Early Coating Failures
Beyond adhesion, poor cleaning can lead to a host of early failures. Skipping or rushing the cleaning process can result in peeling, blistering, or other issues. Since polyurea cures extremely fast – sometimes in as little as 10 to 20 seconds – there’s no time for trapped gases or moisture to escape. Unsealed pinholes can allow gases to expand, causing blisters or leaks.
Factors like high moisture levels, incorrect pH, or leftover contaminants can further weaken the bond. For concrete surfaces, keeping the moisture content below 8% and ensuring the substrate temperature is at least 5°F above the dew point are critical steps to avoid condensation-related failures.
The cost of a failed coating goes far beyond the initial application. Fixing or reapplying a coating can cost two to three times more than getting it right the first time. And in industrial settings, the downtime needed for repairs can lead to major productivity losses.
Atlas Concrete Coatings tackles these challenges head-on by following strict surface preparation protocols. Their process includes moisture and pH testing, thorough cleaning, and creating the right surface profile before applying any polyurea coating. This attention to detail helps ensure long-lasting results and avoids costly mistakes.
Surface Cleaning Methods for Polyurea Coatings
Surface preparation is a meticulous process, with each step playing a critical role in ensuring the success of polyurea coatings. Here’s a closer look at the essential cleaning methods involved.
Step 1: Inspecting the Surface
Before starting any cleaning, it’s important to inspect the surface for contaminants like oil stains, grease, dust, and old coatings that might affect adhesion. Pay special attention to high-traffic areas where buildup is more likely.
For concrete, check that moisture levels are below 8% and pH levels are between 9 and 12. Use a moisture meter for accurate readings or try the simple plastic sheet test: tape a plastic sheet to the surface for 24 hours and check for condensation underneath.
Steel surfaces require a slightly different approach. Examine welds for smoothness and look for rust or corrosion that might need treatment. Even minor imperfections can lead to major problems after the coating is applied, so identifying these issues early is crucial for choosing the right cleaning techniques.
Step 2: Cleaning the Surface
Once the inspection is complete, cleaning methods are tailored to the specific contaminants found. Pressure washing is often the first step to remove dirt and debris, but tougher contaminants like oil and grease require industrial degreasers or solvents to break them down effectively.
After cleaning, use industrial vacuums to remove any leftover particles. Dust and debris left behind can create weak spots in the coating. Additionally, ensure the surface is completely dry – trapped moisture can interfere with adhesion. For heavily contaminated areas, multiple cleaning cycles may be necessary to achieve a clean surface.
Step 3: Removing Old Coatings and Repairs
Mechanical preparation is key when dealing with old coatings or repairs. Techniques like diamond grinding, shot blasting, and sandblasting are commonly used to remove existing layers and create the right surface profile for polyurea coatings.
A surface profile of at least 19 mils is recommended for optimal bonding. This rough texture provides more surface area for the coating to grip, ensuring long-term durability. Smooth surfaces, on the other hand, lack the necessary mechanical bond.
If the surface has failed epoxy coatings, complete removal is essential. Mechanical scarification exposes the original substrate and eliminates weak layers that could compromise the new coating. While chemical stripping is an option, it tends to be less reliable than mechanical methods.
For example, Atlas Concrete Coatings uses diamond grinding and industrial vacuums to create the ideal surface profile. This combination not only removes old coatings but also ensures a clean and prepared surface for the polyurea application.
Tools and Standards for Success
The tools required for proper surface preparation include diamond grinders, shot blasters, pressure washers, industrial vacuums, degreasers, and moisture meters. For steel surfaces, sandblasting equipment and metal primers are essential. Adequate lighting is also important to verify that the surface is thoroughly cleaned.
Adhering to guidelines from organizations like PDA, SSPC, NACE, and ICRI ensures consistent quality. These standards, developed through extensive testing and experience, are critical for achieving long-lasting results with polyurea coatings.
sbb-itb-4b4bb37
Benefits of Proper Surface Cleaning for Polyurea Coatings
Proper surface cleaning plays a critical role in ensuring strong adhesion, lasting durability, a polished appearance, and long-term savings. Let’s explore the key advantages of thorough surface preparation for polyurea coatings.
Better Durability and Longevity
A clean surface is the backbone of a durable coating. When done right, it creates a strong bond that can endure heavy foot traffic, chemical exposure, and extreme temperature changes for 10–20 years or more. On the other hand, skipping proper cleaning can lead to premature failures in as little as 3–5 years. Keeping moisture levels below 8% is essential to prevent defects like pinholes and gas bubbles during application.
Atlas Concrete Coatings has shown that careful surface preparation significantly extends the lifespan of polyurea coatings in both residential and commercial settings.
Better Appearance Results
The appearance of polyurea coatings heavily depends on surface cleanliness. A well-prepared substrate allows the coating to flow smoothly and cure evenly, resulting in a flawless finish. Unlike inferior resins that may fade, discolor, or develop uneven textures over time, polyurea coatings applied on clean surfaces maintain their vibrant color and polished look. With rapid curing times – often within 10–20 seconds for spray applications – even minor contaminants can cause imperfections like discoloration or cloudiness. This makes thorough cleaning an absolute must for achieving a professional, long-lasting finish.
Cost Savings Over Time
Investing in proper cleaning upfront translates to significant savings in the long run. A well-prepared coating not only lasts much longer but also provides three to four times the value compared to poorly prepared surfaces. Clean and properly adhered polyurea coatings resist chipping, staining, and wear, keeping maintenance costs low. By avoiding issues like peeling, flaking, or poor adhesion, property owners can steer clear of costly emergency repairs. Atlas Concrete Coatings highlights that proper preparation helps customers avoid unexpected expenses while ensuring quick installations don’t compromise quality or performance.
These benefits make thorough surface cleaning an essential step in any polyurea coating application, combining durability, aesthetics, and cost efficiency.
Conclusion: Getting Long-Lasting Polyurea Coatings with Proper Cleaning
Proper surface cleaning is the backbone of any successful polyurea coating project. It’s not just a step in the process – it’s the foundation that determines whether your coating will stand the test of time or fail prematurely. With polyurea’s fast curing time of just 10–20 seconds, there’s no room for error once the application begins, making thorough preparation absolutely critical.
Without proper cleaning and preparation, issues like peeling, flaking, or weak adhesion can compromise the durability of the coating. When done right, however, surface cleaning ensures that polyurea coatings can withstand heavy use, exposure to chemicals, and fluctuating temperatures for 10–20 years or more.
This is why industry professionals prioritize detailed cleaning protocols. Companies like Atlas Concrete Coatings take preparation seriously, utilizing industrial-grade equipment and tailored primers while conducting meticulous inspections. This attention to detail results in strong adhesion and durable, flawless finishes for polyurea-coated surfaces, whether it’s a garage floor, a pool deck, or an industrial workspace.
Investing in proper cleaning upfront saves money in the long run by reducing maintenance needs and avoiding costly repairs. Every step of the process, from inspection to application, hinges on how well the surface is cleaned. Thorough preparation ensures your polyurea coating not only looks great but also performs reliably for years to come.
FAQs
Why is it important to check moisture and pH levels before applying polyurea coatings to concrete surfaces?
Ensuring the concrete surface has the proper moisture and pH levels is key to the success of polyurea coatings. Too much moisture can stop the coating from adhering correctly, which may result in peeling or bubbling over time. Likewise, if the pH level is off, it can disrupt the bonding process and weaken the coating’s durability.
By testing these factors in advance, you set the stage for the polyurea coating to bond effectively. This step not only ensures a long-lasting, professional finish but also safeguards your investment by helping the coating perform as it should.
How do you properly clean and prepare a surface before applying polyurea coatings?
Proper surface preparation is the backbone of achieving durable, long-lasting polyurea coatings. The process usually starts with removing old coatings, dirt, oil, and other contaminants to ensure a clean, smooth surface that allows the polyurea to bond effectively.
Techniques like mechanical grinding, shot blasting, and pressure washing are commonly used, depending on the surface’s condition. These methods are essential for ensuring strong adhesion and overall durability. At Atlas Concrete Coatings, every project kicks off with thorough surface cleaning and preparation, ensuring top-tier results for residential, commercial, and industrial spaces.
Why is proper surface cleaning essential for the durability and cost-effectiveness of polyurea coatings?
Proper surface cleaning plays a key role in making sure polyurea coatings stick well and perform as they should for the long haul. A clean surface removes contaminants like dust, grease, and moisture – factors that can weaken adhesion and cause the coating to fail earlier than expected.
Taking the time to prepare the surface thoroughly can make a big difference. It helps your polyurea coating last longer, cutting down on the need for frequent repairs or resurfacing. This not only boosts durability but also saves money in the long run by reducing maintenance costs and getting the most out of your investment.